
|
This has been a very fun project and continues to present challenges as I continue tweaking and modifying but most of all it was something I got to do with my son who wasn’t even born when I first started the process. Now I go to him when I have configuration challenges since he is in the process of building his own projects. I have learned that playing the games is just OK for me. I enjoy the building and troubleshooting and improving on the project as a whole. I hope this information is useful to someone who is going to undertake a project like this or just appreciates learning a little arcade history. Feel free to ask questions or start a discussion about any of the topics presented. Our next goal is to build a multi-driving game for all the great driving games out there like Pole Position, Night Driver, Outrun, etc. We already picked up a non-working Pole Position cabinet so we have a starting point. Intro | The Games | Control Panel Configuration | The Controls | Control Panel Lights | Research | Specific Games | Hardware & Software | Game Configurations | Cabinet Build | Artwork | Bonus | Leaderboard | Summary
2 Comments
This is not really part of my arcade machine build, but it has become an integral part of the experience.
I have been visiting my Aunt for many years and remember seeing this relic many, many times in her home office. I never gave it much thought and just wrote it off as some sort of defunct microscope. Many years ago, she owned a tavern and this was used specifically to make change for the pool tables (and probably some arcade machines). She has had all kinds of unique things around her home. I really liked the idea of the coin changer, but it wasn’t exactly the most attractive piece of equipment, so I had an idea. I had been wanting to make an industrial style lamp for my game room anyway, so I started sketching and came up with this… 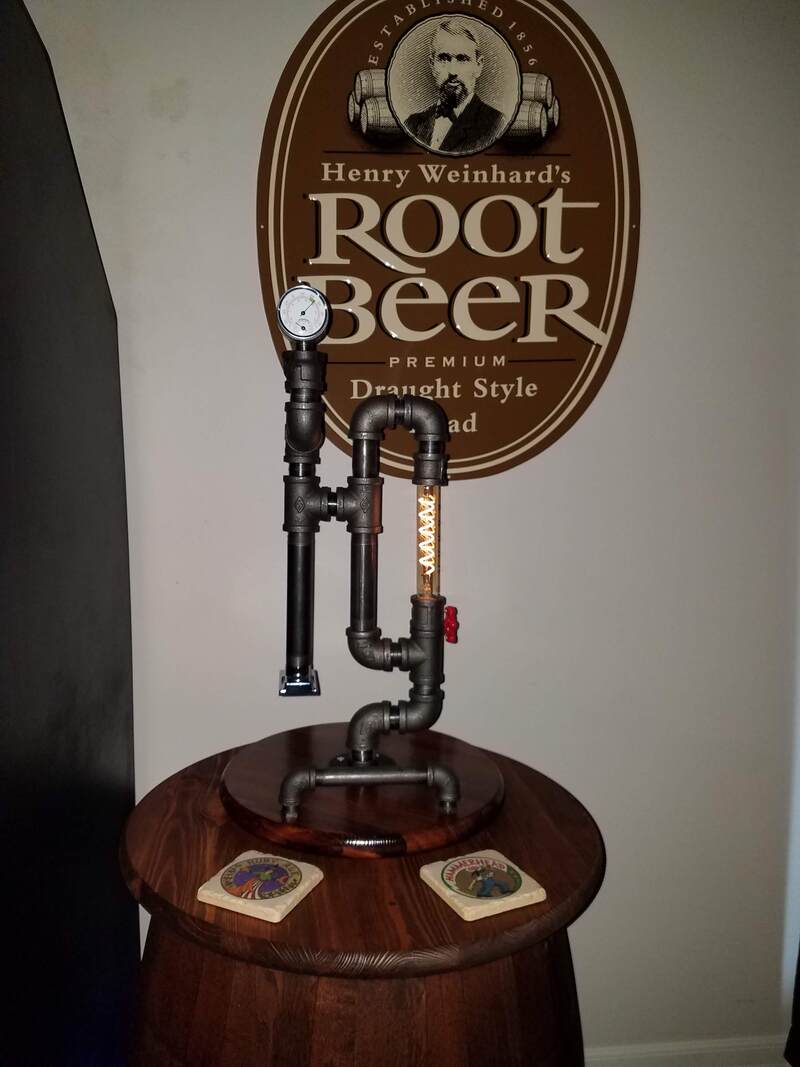 Decorative Lamp with Integrated Kwik-Koin Changer Now I have a multi-functional, decorative piece that is definitely a conversation starter. It is fairly straightforward design using black iron fittings but I want to give a shout out to my friend Roy, The Gun Painter who owns a full-service gunsmith shop and has the equipment I needed to machine a couple of the parts for the lamp section. I highly recommend him if you are looking for a custom paint job on any of your firearms. Check out the gallery on his website at www.thegunpainter.com. Continue to Part 12 - Leaderboard Intro | The Games | Control Panel Configuration | The Controls | Control Panel Lights | Research | Specific Games | Hardware & Software | Game Configurations | Cabinet Build | Artwork | Bonus | Leaderboard | Summary
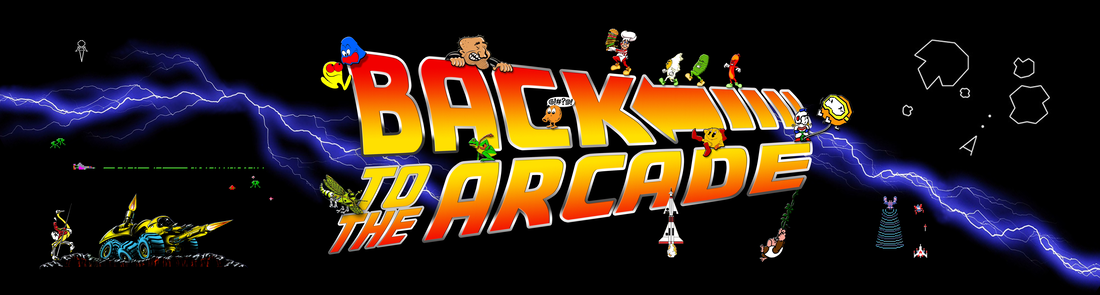
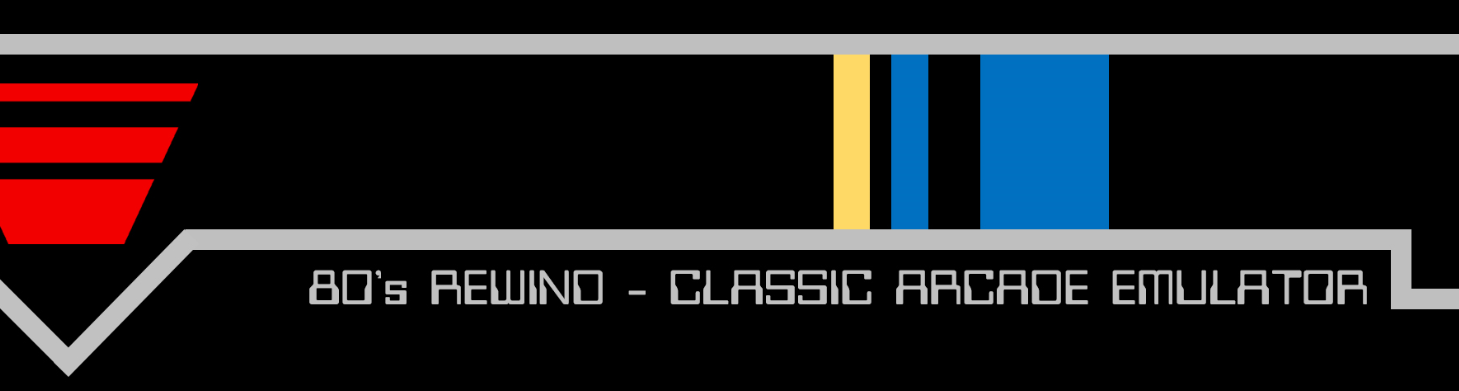
Art is key to any arcade cabinet. After all it was the marquees, bezels, and attract screens that drew us in to the games in the first place. This project essentially forced me to learn Photoshop. I didn’t know a thing about it when I started, but I am picky as to what I wanted so I had to learn so I could get it just the way I liked it. I went through many iterations and a steep learning curve as well. Panel and Riser GraphicsJust as my cabinet design was inspired by Williams, the panel and riser graphics are Defender inspired as well. The riser has instructions on how to navigate the Retropie menu system and this is where I also decided to install my 'exit game' button on the right side.  Panel Riser with Retropie Navigation Instructions 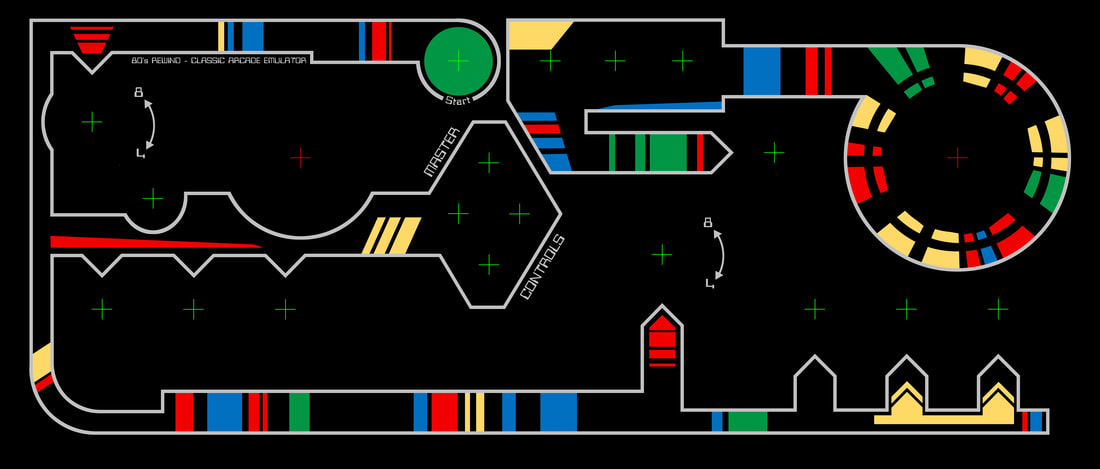 Control Panel MarqueeThis is probably one of the most important graphics on an arcade machine because it is lit up and can be seen from across the room. Before I settled on my Back to the Arcade theme, I was going with 80’s Rewind – Classic Arcade Emulator as my theme. After I changed the theme, I paid homage to the original idea with some graphics on the control panel as seen here.
 Marquee  My Original Marquee Design Bezel ArtSome games like Donkey Kong had a monitor that was almost horizontal with a vertical glass panel and some games had the monitor installed virtually vertical right up against the glass panel. And there was probably every variation imaginable in-between. I opted to install my monitor mostly vertical but at a slight angle and a few inches behind a glass screen to give it some depth behind the bezel art. I designed my own bezel art and chose Escape Pod Online to print and install it which was one of the best decisions I made on this project. The art I created was inspired by Space Duel side art.
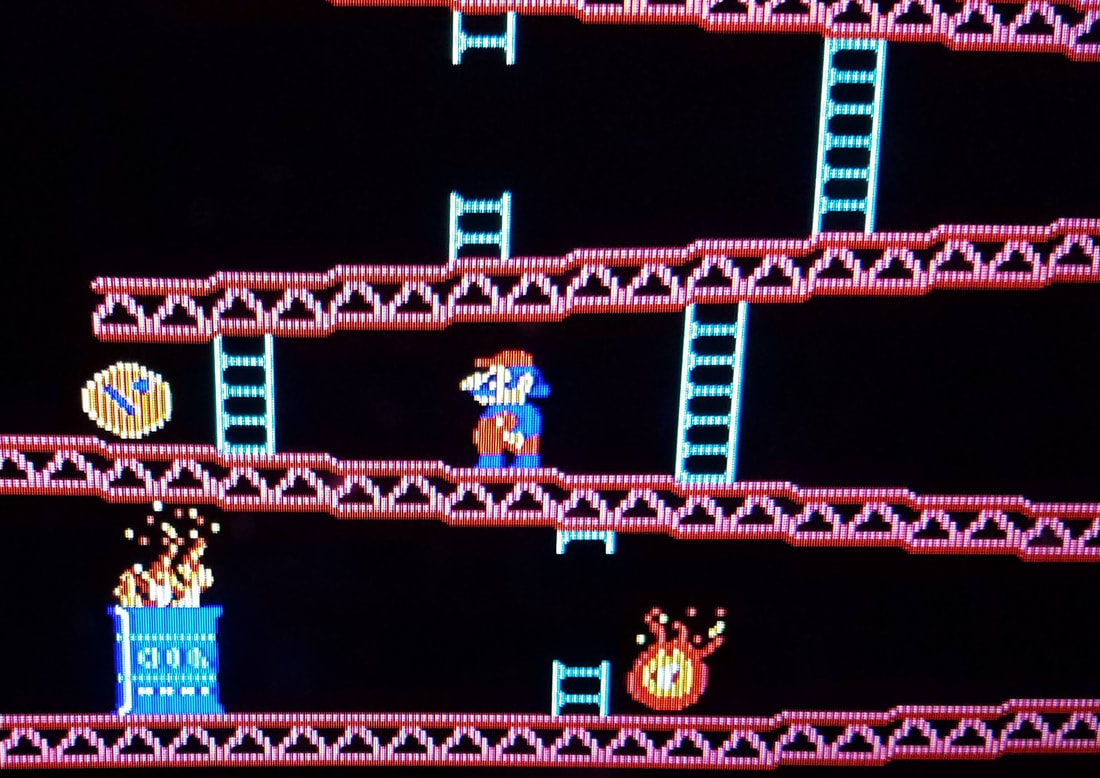
I configured my machine to randomly play the attract mode from several different games and it will play the splash screen below at random. My splash screen is an animation with Donkey Kong playing in the background and the occasional lightning flash with thunder sounds. I'm quite pleased with how it turned out. As you can see, my custom attract screen matches my marquee. BTTA Bezel with Attract Screen (video) Side ArtAlthough much of the side art covered a large part of each machine, it was probably the least appreciated on the cabinets because the arcades would cram in as many games as possible to generate the revenue needed to produce a profit. 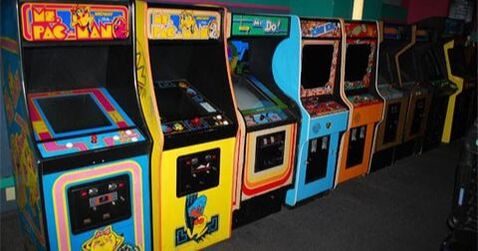 1980's Arcade Typical Layout As for my side art, I have some thoughts but haven’t settled on a design yet. Continue to Part 11 - Bonus Intro | The Games | Control Panel Configuration | The Controls | Control Panel Lights | Research | Specific Games | Hardware & Software | Game Configurations | Cabinet Build | Artwork | Bonus | Leaderboard | Summary
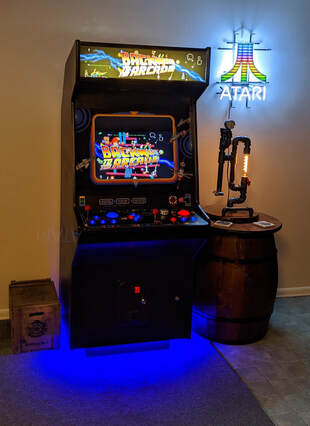
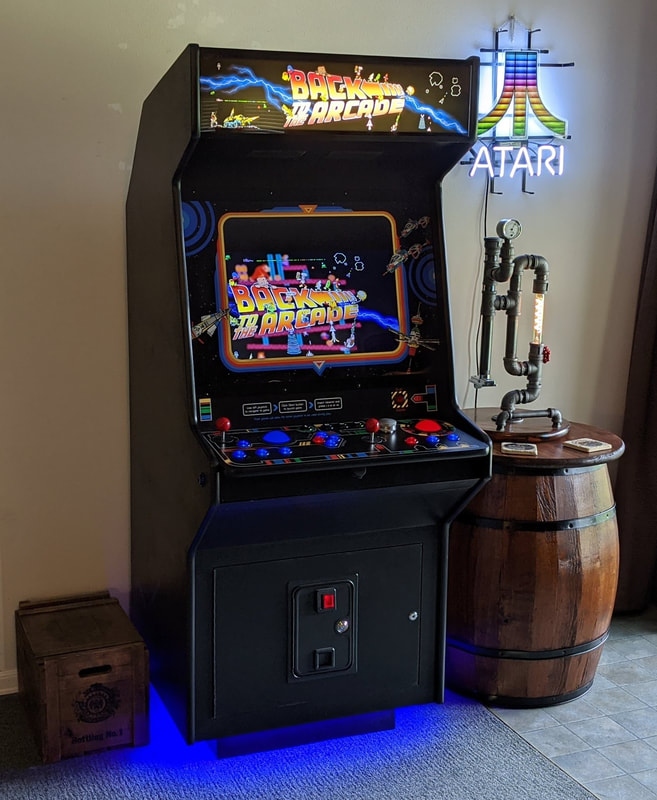 It has finally come down to this. It’s been over 2 years since I built my stand-alone arcade control panel and I am now ready to build the cabinet. The main reason for this timing is that after many years in a house too small for an arcade machine, let alone a family of 6, I finally have the space to enjoy it. The cabinet build went quite well after I chose a design profile which you would think an easy task, but that’s not quite the case. As you can see from the images below, there are no shortage of designs but as you will see shortly, I went with what I consider the classic design which can also be seen in the Williams cabinet designs.
Although I used the Williams profile as my inspiration, I made a few changes to accommodate some features not normally found in arcade cabinets. One of the most notable, but also most invisible is the addition of a pull-out tray to accommodate a steering wheel/pedals or Analog flight style joystick for those games that require those controls to function properly. One thing worth noting is that when I designed the original stand-alone control panel that would eventually become the panel in my cabinet build, I had to consider the overall width of my machine. I wanted it to be wide enough for two people to play head-to-head games side-by-side without interfering with each other. Yet I had to keep it skinny enough to fit through a standard doorway (the last thing I needed was to get it all built in my garage and not be able to gt it into my game room). In the slideshow below, you will see a cardboard panel with printed buttons that we used to 'mock play' games side-by-side to test the concept. It actually worked out quite well. I built my entire cabinet from 2 sheets of MDF, including the control panel which I had to re-build since the original did not quite fit the geometry of the cabinet. One of the drawbacks of building the panel before I had all the details worked out for the cabinet. Continue to Part 10 - Artwork Intro | The Games | Control Panel Configuration | The Controls | Control Panel Lights | Research | Specific Games | Hardware & Software | Game Configurations | Cabinet Build | Artwork | Bonus | Leaderboard | Summary
Since I am running 35+ year old games on a modern LCD monitor we need to make some configurations to make the games look the part. When installed natively on an LCD screen, the graphics are too sharp and not the way they were intended or designed. As such, we need to ‘dumb down’ the image a bit to make it look more authentic. One of the main distinctions of CRT monitors are scanlines. There is a great video on the topic on YouTube which I suggest watching. I've provided a couple examples below, but my camera is having a hard time really showing the distinction.
Not only are LCD monitors very high resolution compared to their CRT counterparts, they also do not have the ghosting effect produced by CRT monitors. Each of the emulators mentioned in an earlier chapter have different configuration settings to achieve these effects so that should be a consideration, along with which games you want to play when you decide which emulator to use for your project. Continue to Part 9 - Cabinet Build Intro | The Games | Control Panel Configuration | The Controls | Control Panel Lights | Research | Specific Games | Hardware & Software | Game Configurations | Cabinet Build | Artwork | Bonus | Leaderboard | Summary
What is a Raspberry Pi? It is a small (about the size of a pack of cigarettes) computer that runs open source Linux operating systems. And best of all it is only $35. Add a few more $$ for a case, power supply, and maybe a heat sink and fan and you may hit $60. Not bad for a computer that will power a complete vintage arcade machine running hundreds of games. Not to mention that the entire operating system, configuration files, and hundreds of games are kept on a Micro-SD card (puts shame to the microfilm from the old James Bond films of the 60’s/70’s). But I digress.
The operating system of choice for vintage gaming is Retropie, which is what I am using. Because of the open source nature of this system, I was able to do some custom configuration of my project. I am not a coder, and definitely didn’t know a thing about coding in Linux when I started this project but fortunately it builds on the BASIC programming that I learned back in high school almost 35 years earlier. So with a little help (ok, a LOT of help) from Google, and some reverse engineering I have been able to muddle through it and figure things out. Fortunately there are quite a few people building vintage arcade systems and I was able to tap into that community. One of the best resources for me has been the Retropie Forum where you can find me as DRB. I talked about controls in an earlier chapter, and how I came to the configuration I chose but this may be a good place to talk about the software side of it. One thing I have noticed about many of the posts on the internet is that it appears that most of the vintage system builders are building systems a bit later than mine. Many of them focus on the fighting games that came later in the 80’s and into the 90’s as well as more Nintendo and Sega systems. Due to my impressionable years being late 70’s to early 80’s, my drive was to build a system with the games from that era which makes me more of an Atari guy I guess.
Now that I brought it up, I’ll take a minute to talk about MAME. MAME, or Multiple Arcade Machine Emulator is what makes all of this possible in the first place. MAME is a project developed to preserve the history of vintage video games and how I got involved in this whole project many, many years ago. I won’t go into all the details here, but you can click on the link above to learn more about the MAME project. Another thing to note is that I am not limited to AdvanceMAME, I can use different emulators as needed for my games, but as I mentioned AdvanceMAME is the best at handling the trackball/spinner games so most of my games run on this system which uses ROMset version 106.
If you want to know if a particular game will run on AdvanceMAME version 106 feel free to leave a question here or contact me directly and I will do my best to answer, but please do not ask me where to get ROMs. Continue to Part 8 - Game Configurations Intro | The Games | Control Panel Configuration | The Controls | Control Panel Lights | Research | Specific Games | Hardware & Software | Game Configurations | Cabinet Build | Artwork | Bonus | Leaderboard | Summary
Prior to 1978 there were a reasonable amount of games already in circulation; and there were actually arcades, but not the arcades we came to know in the early 1980's. The older arcades were filled with pinball machines and electro-mechanical games commonly referred to as Penny Arcades, whereas the arcades of the 1980's became known as video arcades. I mentioned in my intro that I played some of these games at local pizza parlors, as they were called back then. I'm specifically talking about games that pre-date the Space Invaders, Centipede, Pac-Man, Donkey Kong craze that really launched the video arcade revolution. In the introduction I mentioned a few games that I re-discovered during my journey to go Back to the Arcade. I specifically mentioned Sprint One (1978), Sea Wolf (1976), and Lunar Lander (1979), but there are several others that fit into this category due to their unique cabinet and control designs. Once the games of the 80's came into their own, most of them were displayed on color monitors and controlled by a single joystick and 1 or 2 buttons. What makes the aforementioned games special is that they used unique control systems and presentation techniques to really immerse the player into the action.
I have to admit that is was not until I tackled this project that I truly gained my appreciation for this game and the technology used. I have probably spent more time trying to properly emulate Sea Wolf on my system more than any other game I have.
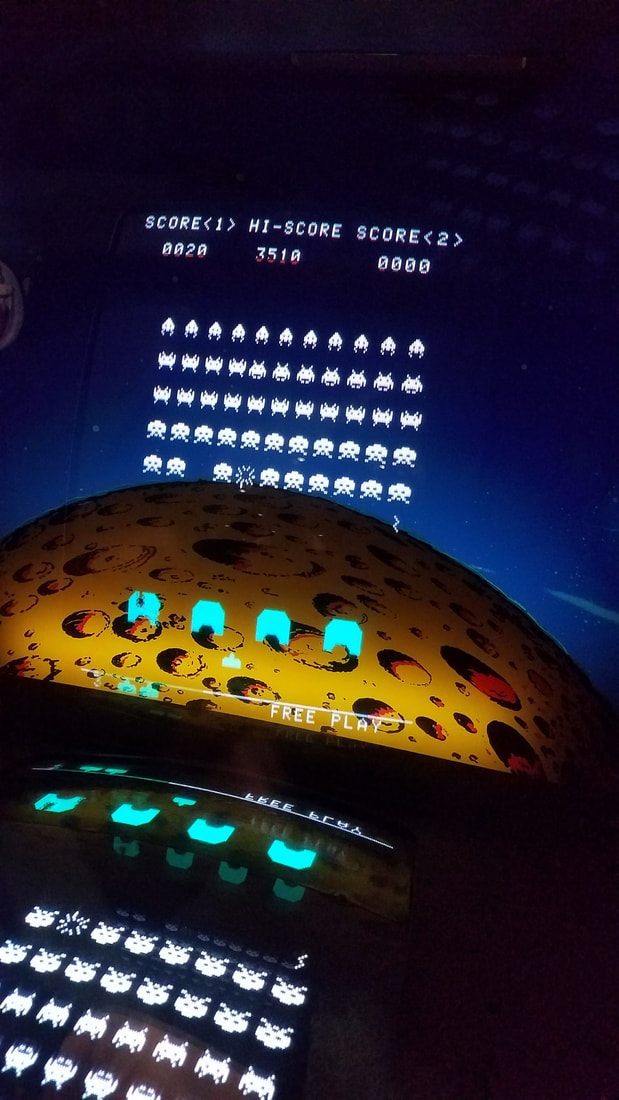
It is worth noting that not all of the Space Invaders games used this 3-D design in their cabinets. I remember the first one only being a black & white screen with transparent green overlays for the barricades at the bottom and a transparent red overlay for the special ship that transited the top of the screen.
There is currently an effort to emulate non-CPU based games such as this. The project is called DICE which stands for Discrete Integrated Circuit Emulator and as of the time of this writing cannot be emulated on my Raspberry Pi.
This is actually a very interesting topic and for anyone who is interested in more information I would also suggest the following: http://discrete.mameworld.info/ Continue to Part 7 - Hardware & Software Intro | The Games | Control Panel Configuration | The Controls | Control Panel Lights | Research | Specific Games | Hardware & Software | Game Configurations | Cabinet Build | Artwork | Bonus | Leaderboard | Summary
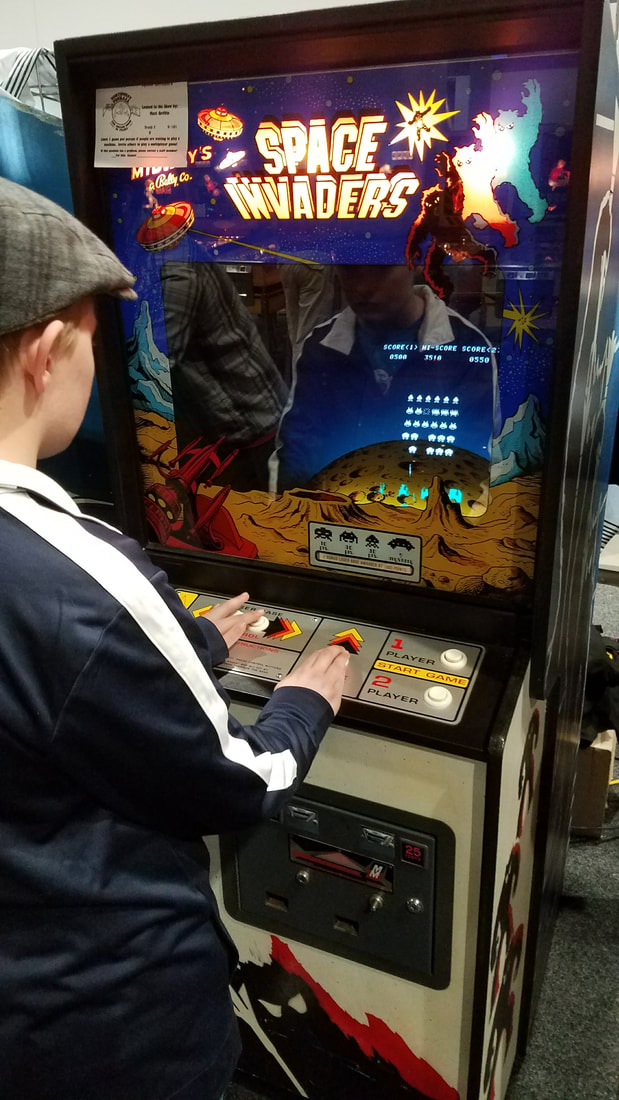
Now that the panel is built and the games are acquired it's time to configure. For those of you who haven't been keeping up, there have been some technological changes between 1980 an 2017. Fortunately the NW Pinball & Arcade Expo was coming up and it is only an hour drive away. This gave my son and I an opportunity to see some authentic games as they were back in the day, and for him to play many of them for the first time. We showed up ready to take pictures, take measurements, and of course, play some vintage video games that were all on FREE PLAY! How cool is that?
Traveling BacK In TimeOur machine was up-and-running and we have been enjoying some vintage games but there was still some tweaking to do to get even closer to the authentic experience of 1980. What better way to research than to travel back in time to an actual arcade from the 1980's. Even though this whole project has been a research project since 1999 and we attended the NW Pinball & Arcade Expo to gather more authentic intel, there is only one way to really validate the authenticity. My memory is not quite what it used to be so in early 2018 we got into our time-traveling Delorean, a.k.a. 2005 VW Jetta (OK, maybe not the same thing, but they are both silver) and traveled back in time to 1980. SPOILER ALERT - we didn't really travel back in time, but we did go to the Living Computer Museum in Seattle where they were celebrating the 80's with an exhibit called, Totally 80's Rewind complete with a 1980's high school computer classroom, family basement, and an accurate arcade called The Bit Zone.
 CRT | LCD Although the above photo is not an actual arcade game (it is an Atari VCS home console game) it demonstrates the difference seen between the CRT and LCD. Most notably being the ghosting (no pun intended) on the CRT side. The LCD side is nice and crisp, which was not the original intent of the graphics. Additionally CRT monitors had a noticeable curvature to them while LCD monitors are flat screens. Even with this knowledge, I will be using an LCD monitor for my project but adjusting the images via code to replicate the original as true as possible. Continue to Part 6 - Specific Games Intro | The Games | Control Panel Configuration | The Controls | Control Panel Lights | Research | Specific Games | Hardware & Software | Game Configurations | Cabinet Build | Artwork | Bonus | Leaderboard | Summary
 Control Panel with Lights It's not enough to just have a cool control panel, we also need lighting. I discovered that there are some lighting kits out there but I figured I could do it for less money; and I did. I was fortunate to have a local electronics store where I purchased some 'wearable' LED's which were the basis for my lighting system. I made some bases from polystyrene sheet and glued the LED's to them. While my control panel was in this 'portable' configuration I just hooked up 2 D-cell batteries to power the lights. Continue to Part 5 - Research Intro | The Games | Control Panel Configuration | The Controls | Control Panel Lights | Research | Specific Games | Hardware & Software | Game Configurations | Cabinet Build | Artwork | Bonus | Leaderboard | Summary
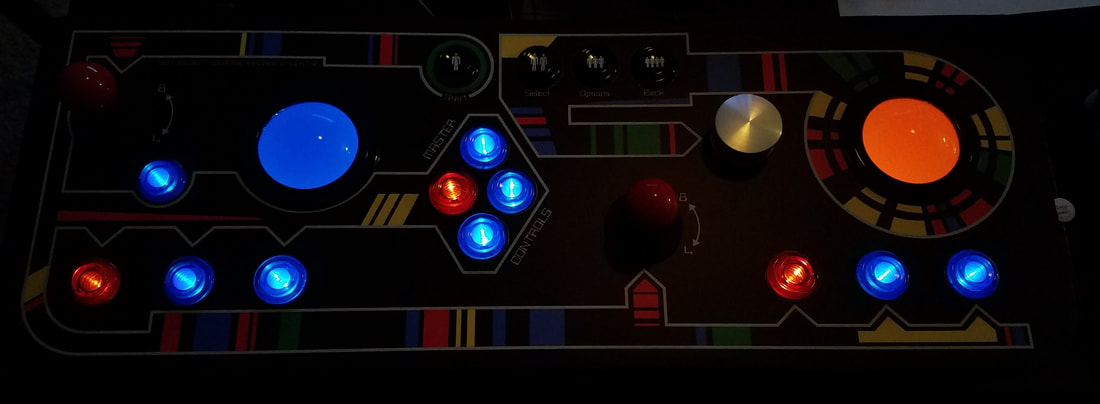
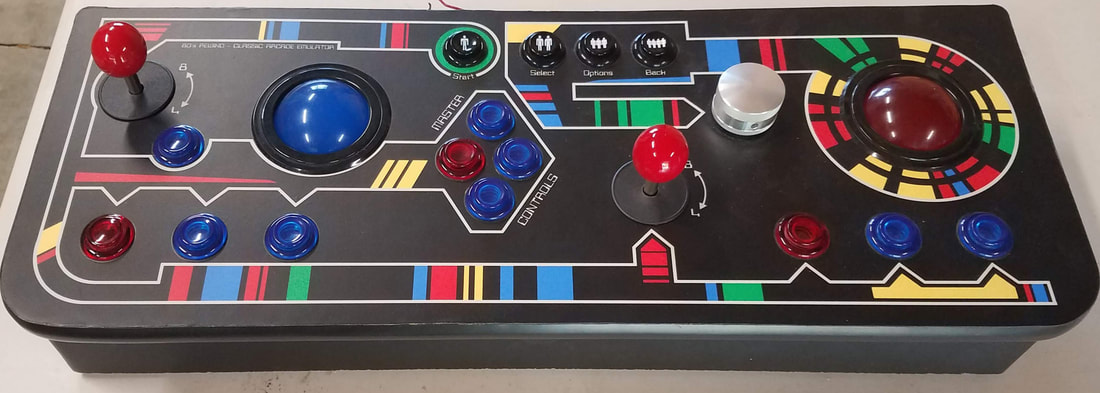 After many years of tinkering and configuring changes I still didn't have the space for an arcade cabinet, but there was no reason that I couldn't build a real arcade control panel that would connect to the TV for somewhat authentic game play. So I made the decision to build a real control panel. In January 2017 I put together a list of controls that I would need and made an order! Actually I made a few orders. All of the controls and the keyboard encoder came from Ultimarc and the buttons came from Paradise Arcade Shop and Focus Attack because Ultimarc did not stock the concave style translucent buttons that I wanted. I also had a hard time finding Player 3 and Player 4 buttons which were needed primarily for 2 more of my favorites, Track & Field and Hyper Sports. Up until this point I thought I was going to run this system from an old PC or laptop (I had plenty of those laying around) but my daughter, the one who was 5 years old when I started this venture was now 23 years old and quite the techie suggested that I use a Raspberry Pi for this project. At first I was a bit reluctant to go through a new learning curve but as I did a little research it made a lot of sense, so that is what I did. I'll be discussing a bit more about the Raspberry Pi and the operating system, Retropie in a later chapter.
Another benefit to the 4/8-way joysticks is that I can now add Q*bert and Congo Bongo to my collection because when the joysticks are configured as 8-way they work great as diagonal 4-way sticks for these type of games.
A discussion about controls wouldn't be complete with out talking about the keyboard encoder. This is actually the heart of the control system. I went with the Mini-PAC Opti which is an Integrated Switch/Joystick/Trackball/Spinner interface. Since my setup has 2 trackballs, I also used a U-HID Nano to connect my second trackball.
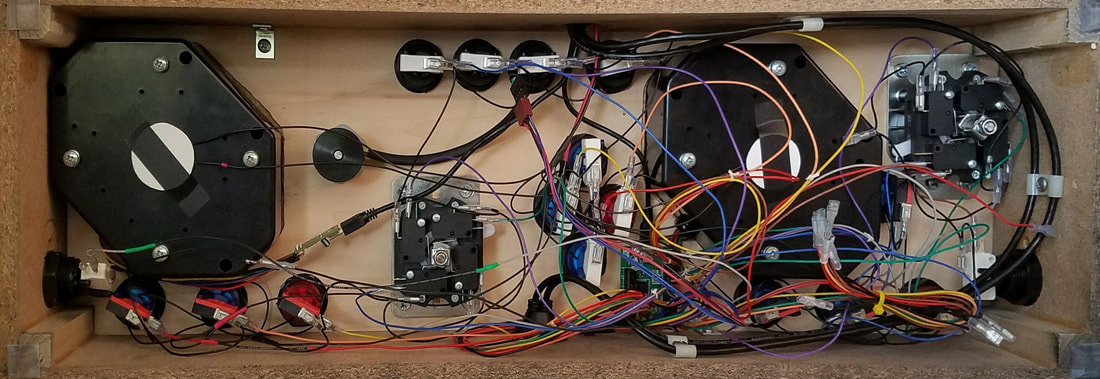 Control Installation and Wiring 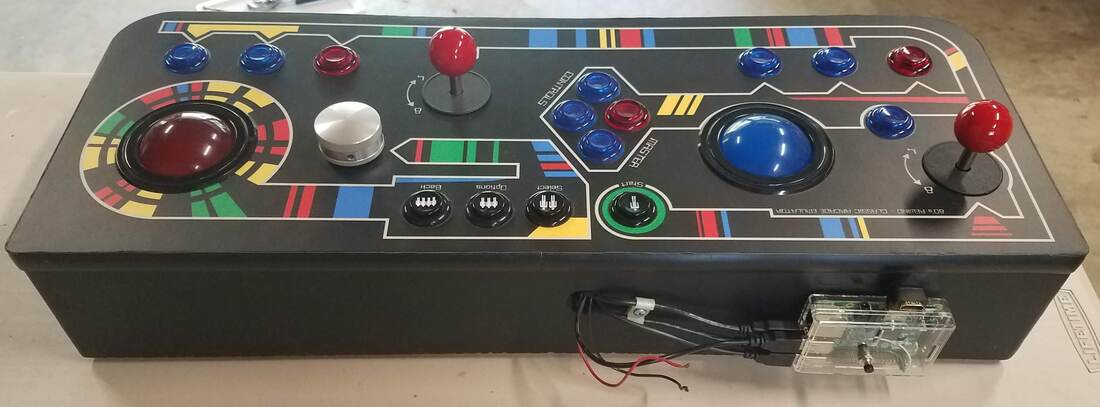 Final project with Raspberry Pi installed on the back of the panel housing Continue to Part 4 - Control Panel Lights Intro | The Games | Control Panel Configuration | The Controls | Control Panel Lights | Research | Specific Games | Hardware & Software | Game Configurations | Cabinet Build | Artwork | Bonus | Leaderboard | Summary
|
Dan BlanchardThis is my collection of tips, tricks, and projects that I have made over the years while enjoying my various hobbies. Categories
All
Archives
July 2020
|


 RSS Feed