
 After many years of tinkering and configuring changes I still didn't have the space for an arcade cabinet, but there was no reason that I couldn't build a real arcade control panel that would connect to the TV for somewhat authentic game play. So I made the decision to build a real control panel. In January 2017 I put together a list of controls that I would need and made an order! Actually I made a few orders. All of the controls and the keyboard encoder came from Ultimarc and the buttons came from Paradise Arcade Shop and Focus Attack because Ultimarc did not stock the concave style translucent buttons that I wanted. I also had a hard time finding Player 3 and Player 4 buttons which were needed primarily for 2 more of my favorites, Track & Field and Hyper Sports. Up until this point I thought I was going to run this system from an old PC or laptop (I had plenty of those laying around) but my daughter, the one who was 5 years old when I started this venture was now 23 years old and quite the techie suggested that I use a Raspberry Pi for this project. At first I was a bit reluctant to go through a new learning curve but as I did a little research it made a lot of sense, so that is what I did. I'll be discussing a bit more about the Raspberry Pi and the operating system, Retropie in a later chapter.
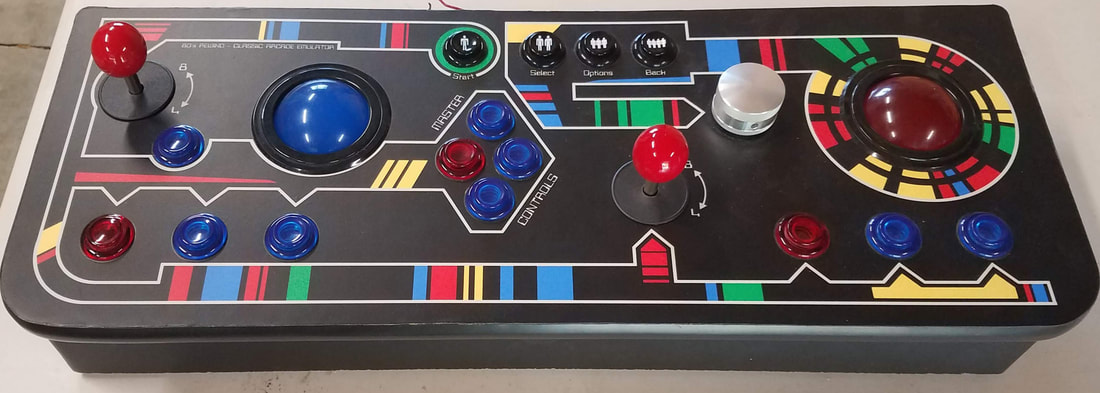
Another benefit to the 4/8-way joysticks is that I can now add Q*bert and Congo Bongo to my collection because when the joysticks are configured as 8-way they work great as diagonal 4-way sticks for these type of games.
A discussion about controls wouldn't be complete with out talking about the keyboard encoder. This is actually the heart of the control system. I went with the Mini-PAC Opti which is an Integrated Switch/Joystick/Trackball/Spinner interface. Since my setup has 2 trackballs, I also used a U-HID Nano to connect my second trackball.
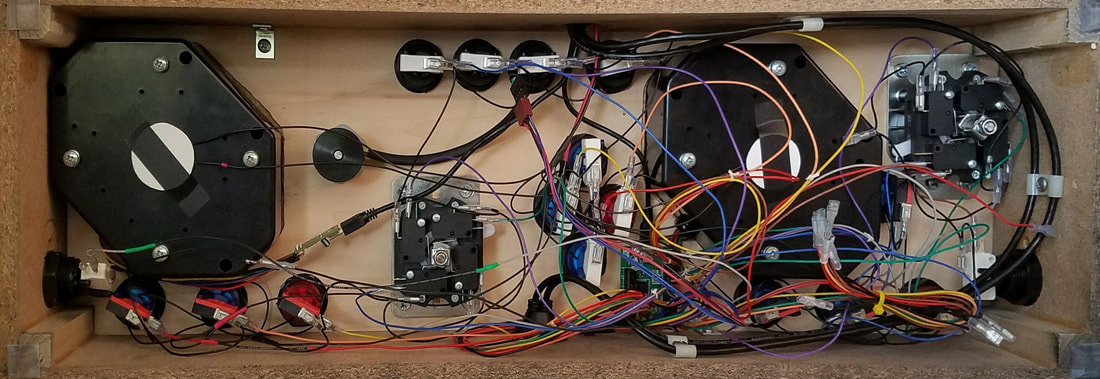 Control Installation and Wiring 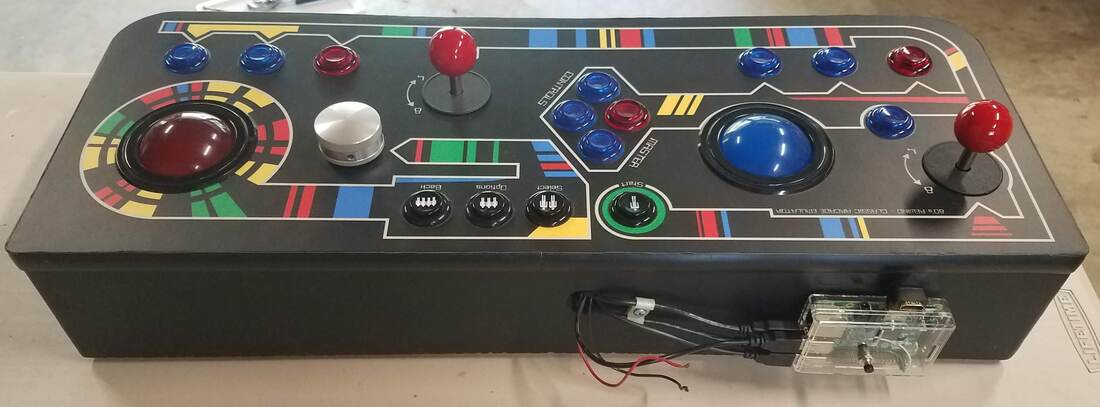 Final project with Raspberry Pi installed on the back of the panel housing Continue to Part 4 - Control Panel Lights Intro | The Games | Control Panel Configuration | The Controls | Control Panel Lights | Research | Specific Games | Hardware & Software | Game Configurations | Cabinet Build | Artwork | Bonus | Leaderboard | Summary
0 Comments
Leave a Reply. |
Dan BlanchardThis is my collection of tips, tricks, and projects that I have made over the years while enjoying my various hobbies. Categories
All
Archives
July 2020
|


 RSS Feed